How to install and configure Stripe on Magento 2
In this post, I will guide you through the process of installing and configuring Stripe on a Magento 2 site.
Stripe Extension Installation
To install the Stripe extension, you first need to purchase it from the Magento Marketplace. Search for "Magento 2 Stripe free extension" and proceed with the purchase.
After acquiring the extension, use the following command to install it on your Magento 2 project:
composer require stripe/stripe-payments
Once the command runs successfully, execute Magento 2's general upgrade, deploy, and compile commands to finalise the installation of the module on your site.
Stripe Extension Configuration
To configure the Stripe extension on your site, begin by setting up a Stripe account at dashboard.stripe.com. You can set up an account in test mode for initial configuration and testing purposes.
Upon logging into your Stripe account, navigate to dashboard.stripe.com/test/apikeys to obtain your API access keys for configuration within the Magento admin. These keys include the API Publishable Key and API Secret Key.
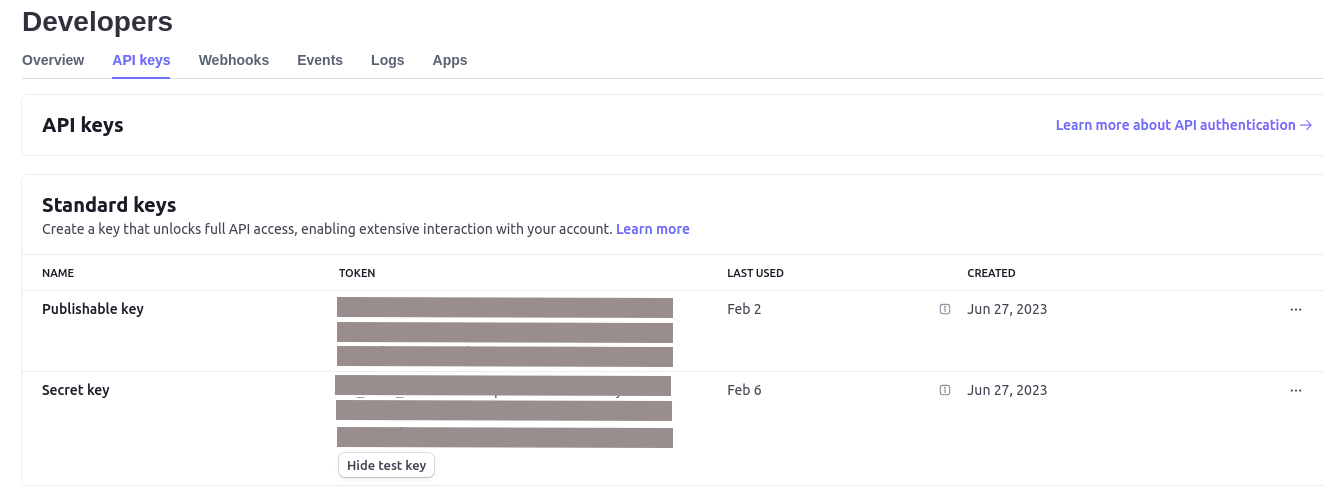
Copy these keys for future use in the Magento configuration.
In your Magento 2 admin panel, navigate to Stores -> Configurations -> Sales -> Payment Methods -> Stripe -> Configure.

General Settings
To use Stripe on your site, configure the following general settings:
- Mode: Select between Test/Live based on your environment.
- Publishable Key: Copy from your Stripe account.
- Secret Key: Copy from your Stripe account.
- Receipt emails: Enable to allow Stripe to send payment receipts to customers upon successful transactions.

Payments
After configuring General Settings, proceed to configure Payments settings. These fields are pre-configured by default but can be adjusted according to your requirements.
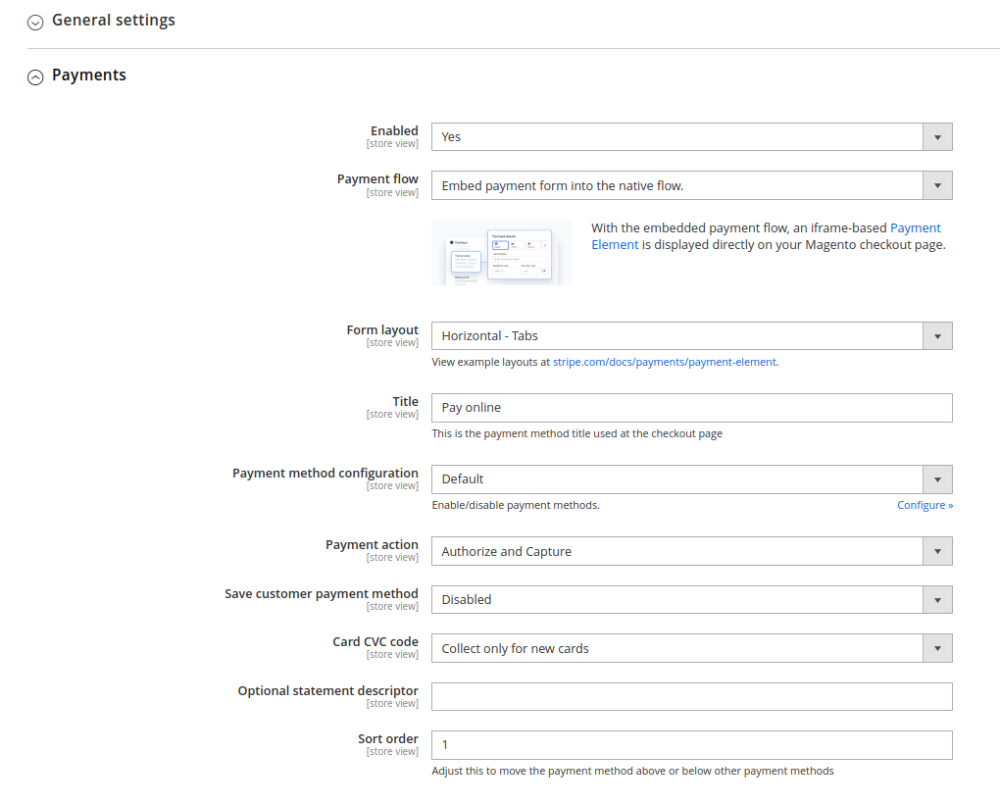
Enabling these settings will allow Stripe to be used on the checkout page, enabling customers to make payments using it.
In addition to these settings, the extension offers various other configuration options, including:
- Bank Transfers: Allows customers to choose a bank transfer as a payment option.
- Wallet Button: Enables customers to use device-supported payment buttons such as Apple Pay, Google Pay, and others.
- Fraud via Stripe Radar: Enables the fraud detection system provided by Stripe.
- Subscriptions: Allows creation and management of subscriptions directly via your Magento Admin, facilitating the addition of a recurring revenue stream to your business model.
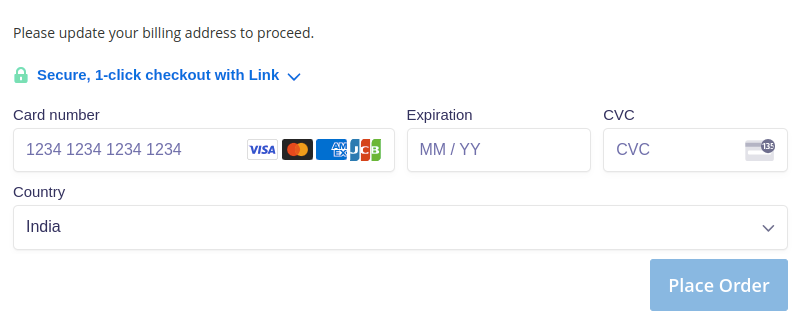
Frontend Checkout
This is how Stripe works on the frontend checkout.
With these steps, you can seamlessly integrate and configure Stripe on your Magento 2 site, providing a secure and convenient payment solution for your customers.
Conclusion
In this post, you've installed the Stripe extension for Magento 2 Open Source. The extension is then configured using Stripe API Keys and set up in Magento Admin. The same process applies to Adobe Commerce and Adobe Commerce Cloud editions. Should you require assistance with the extension setup, feel free to contact us.